Elemental Reaction Multiplier: Why 1,000 EM Means Three Different Things
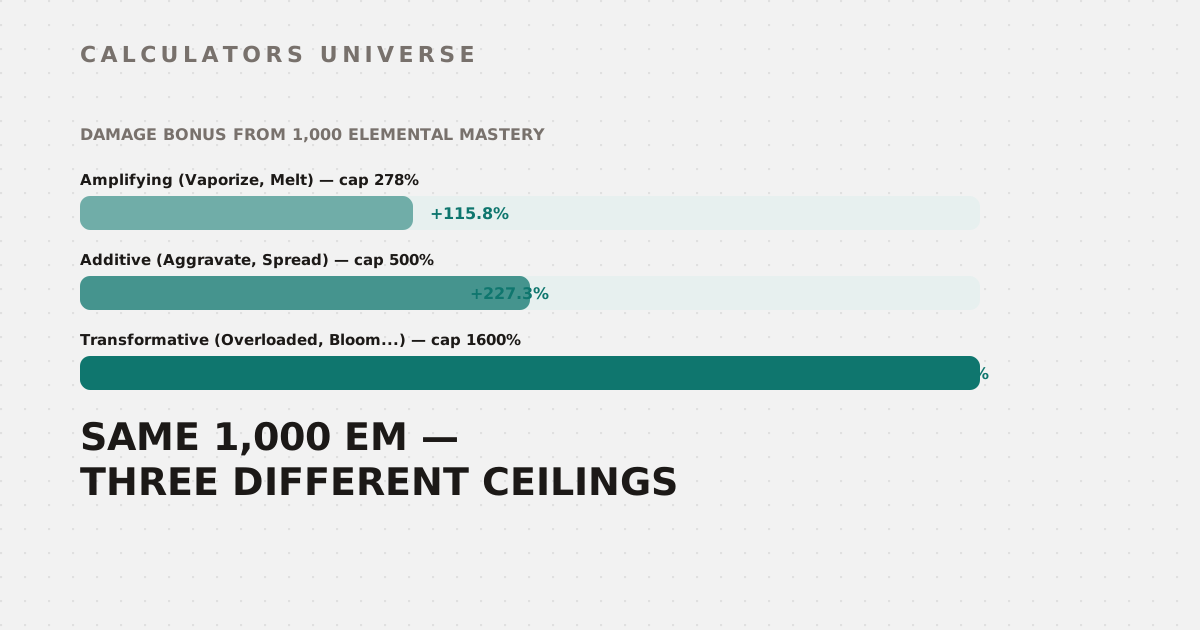
1,000 Elemental Mastery gives Hyperbloom a 533% damage bonus but only 116% to Vaporize — not because one reaction is stronger, but because each category's formula has a completely different ceiling.
Elemental Reaction Multiplier: Why 1,000 EM Means Three Different Things
Feed 1,000 Elemental Mastery into a Transformative reaction like Hyperbloom, and the damage bonus comes out to 533.3%. Feed the exact same 1,000 EM into an Amplifying reaction like Vaporize, and the bonus is only 115.8% — less than a quarter as much. Neither number is a bug, and Vaporize isn’t “worse” at scaling with EM in some vague sense. Each reaction category runs its own formula with its own ceiling, and the Elemental Reaction Multiplier Calculator applies all three exactly. Here’s the math behind each one.
Three Categories, Three Formulas
Every elemental reaction falls into one of three categories, and each has its own EM-bonus formula with a different maximum coefficient and a different “half-saturation” constant:
| Category | Example reactions | EM bonus formula | Theoretical max bonus |
|---|---|---|---|
| Amplifying | Vaporize, Melt | (2.78 × EM) ÷ (EM + 1,400) | 278% |
| Additive | Aggravate, Spread | (5.0 × EM) ÷ (EM + 1,200) | 500% |
| Transformative | Overloaded, Bloom, Hyperbloom, Swirl, etc. | (16.0 × EM) ÷ (EM + 2,000) | 1,600% |
All three formulas share the same hyperbolic shape — rapid early growth that flattens out — but Transformative reactions can theoretically reach a bonus nearly six times higher than Amplifying reactions can, simply because their formula’s numerator constant (16.0) is so much larger.
The Full Curve, Side By Side
Running all three formulas across a range of EM values shows exactly how differently they scale even from identical inputs:
| EM | Amplifying bonus | Additive bonus | Transformative bonus |
|---|---|---|---|
| 0 | 0% | 0% | 0% |
| 200 | 34.8% | 71.4% | 145.5% |
| 500 | 73.2% | 147.1% | 320.0% |
| 1,000 | 115.8% | 227.3% | 533.3% |
| 2,000 | 163.5% | 312.5% | 800.0% |
| 3,000 (input cap) | 189.5% | 357.1% | 960.0% |
At every single EM value in this table, Transformative comes out roughly 2–3x ahead of Additive, and Additive comes out roughly 2x ahead of Amplifying. That gap is baked into the formula constants themselves — it has nothing to do with build quality or optimization, only which reaction category you’re building around.
Where the “Efficiency Wall” Actually Sits
The calculator also reports an efficiency score — how much of each formula’s early, steep growth region a given EM value is still capturing, expressed as a percentage that starts at 100% and decays toward zero. Solving each formula for the EM value where efficiency crosses specific thresholds reveals where the real diminishing-returns wall sits for each category:
| Category | EM at 75% efficiency | EM at 50% efficiency | EM at 25% efficiency |
|---|---|---|---|
| Amplifying | 467 | 1,400 | 4,200 |
| Additive | 400 | 1,200 | 3,600 |
| Transformative | 667 | 2,000 | 6,000 |
The calculator’s own input validation caps Elemental Mastery at 3,000 — which means, within the tool’s own valid range, you can never actually push any category down to 25% efficiency. The lowest efficiency reachable at the 3,000 EM cap is 31.8% for Amplifying, 40.0% for Transformative, and 28.6% for Additive. Wherever the “wall” is in practice, this calculator’s input range keeps every category solidly above the steepest part of the drop-off.
Reading the Output: Why Amplifying Shows Zero Flat Damage
One detail that trips people up: run an Amplifying reaction like Vaporize or Melt through the calculator, and the “Final Reaction Damage” field always comes back as 0. That’s by design, not a missing feature. Amplifying reactions don’t deal their own standalone hit — they multiply whatever attack triggered them. The calculator still reports the full total multiplier (base multiplier × (1 + EM bonus + special bonus)), but applying that multiplier to an actual damage number is a separate step that depends on the attack that triggered the reaction, not on the reaction itself. Transformative and Additive reactions, by contrast, do produce a standalone flat damage number, scaled directly from the character’s level.
A Fully Worked Example: Hyperbloom at Level 90
Take a Level 90 character with 1,000 Elemental Mastery and a 15% special damage bonus from artifact sets, running Hyperbloom (Transformative, base multiplier 6.0):
EM bonus     = 16.0 × 1,000 / (1,000 + 2,000) = 5.333 (533.3%)
Level base   = 723.4 (exact Level 90 breakpoint)
Total mult.  = 6.0 × (1 + 5.333 + 0.15) = 38.9
Final damage = 723.4 × 38.9 = 28,140.3
Run that same character’s Vaporize (Hydro on Pyro, Amplifying, base multiplier 2.0) instead:
EM bonus     = 2.78 × 1,000 / (1,000 + 1,400) = 1.158 (115.8%)
Total mult.  = 2.0 × (1 + 1.158 + 0.15) = 4.62
Final damage = 0 (multiplier applies to the triggering attack, not a standalone hit)
Two reactions, identical character stats, two completely different kinds of output — one a direct damage number, one a multiplier waiting to be applied elsewhere.
Level Scaling: Why 90 Matters
Base reaction damage doesn’t scale linearly with character level — it’s built from ten measured breakpoints (level 1 through 90) with linear interpolation between them for any level that falls in between. The jump from Level 80 (539.0 base damage) to Level 90 (723.4) is a genuine 34.2% increase — the single largest proportional jump between any two adjacent breakpoints in the table, which is exactly why reaching Level 90 matters disproportionately for reaction-focused builds.
How to Use the Elemental Multiplier Calculator
- Open the Elemental Reaction Multiplier Calculator.
- Select your reaction type — the tool automatically applies the correct category formula.
- Enter your character level and current Elemental Mastery.
- Add any special set or passive bonus as a decimal (0.15 for 15%).
- Read the EM bonus percentage, total multiplier, and — for Transformative and Additive reactions — the final flat damage number. For Amplifying reactions, apply the reported multiplier to your triggering attack’s damage separately.
Related Calculators
Make sure your artifact rolls are actually hitting meaningful EM thresholds with the Artifact Efficiency Score Calculator, and check whether your reaction damage changes how many hits a boss fight actually takes with the HTK Breakpoint Tool. Calculate full character damage output with the Genshin Damage Calculator, balance Crit Rate against Crit DMG with the Genshin Crit Ratio Optimizer, and plan your Adventure Rank leveling with the Genshin AR EXP Calculator.
Frequently Asked Questions
Why does Transformative scale so much better with EM than Amplifying?
It comes down entirely to the formula constants — Transformative’s bonus formula has a maximum coefficient of 16.0 against Amplifying’s 2.78, meaning Transformative reactions can theoretically reach a bonus nearly six times higher at the same EM investment. This isn’t a quality difference between reaction types; it reflects each category’s base damage design in the underlying game balance.
Is 1,000 EM really a “build trap” for every reaction type?
Not equally — 1,000 EM sits well past the 50% efficiency mark for Additive (1,200) and close to it for Amplifying (1,400), but Transformative reactions don’t cross that same 50% efficiency threshold until roughly 2,000 EM. Whether 1,000 EM is a trap depends heavily on which reaction category your build actually leans on, not a single universal number.
Why does the calculator cap Elemental Mastery at 3,000?
Beyond a certain point the returns become so marginal relative to alternative stats (Crit Rate, Crit DMG, DMG% bonuses) that higher inputs stop reflecting realistic in-game builds. At the 3,000 cap, every category still sits above roughly 28–40% efficiency, which keeps the tool’s output range grounded in stat allocations players might actually reach rather than purely theoretical extremes.
Does the special bonus field stack additively or multiplicatively with the EM bonus?
Additively — the formula is Total Multiplier = Base Multiplier × (1 + EM Bonus + Special Bonus), so a 15% special bonus and a 533% EM bonus combine into a single (1 + 5.333 + 0.15) term before being multiplied by the reaction’s base multiplier, rather than being applied as two separate multiplicative layers.
Why do Transformative reactions like Swirl never show a Crit damage option?
Transformative reactions are calculated entirely from level-scaled base damage and Elemental Mastery — they don’t interact with Crit Rate or Crit DMG at all in this formula, which is why the calculator’s output for these reactions has no Crit-related fields. Only your regular attacks and Amplifying-reaction-boosted hits benefit from Crit stats; the Transformative reaction’s own flat damage does not.
The same 1,000 Elemental Mastery investment can mean a 116% bonus, a 227% bonus, or a 533% bonus depending entirely on which reaction category it’s feeding — checking which formula applies before judging whether a stat point is “worth it” matters more than the raw EM number itself.
External Resources
- KeqingMains: Elemental Multiplier Theory — community theorycrafting hub covering reaction damage formulas in depth
- Genshin Wiki: Elemental Mastery — reference documentation on Elemental Mastery’s mechanical effects