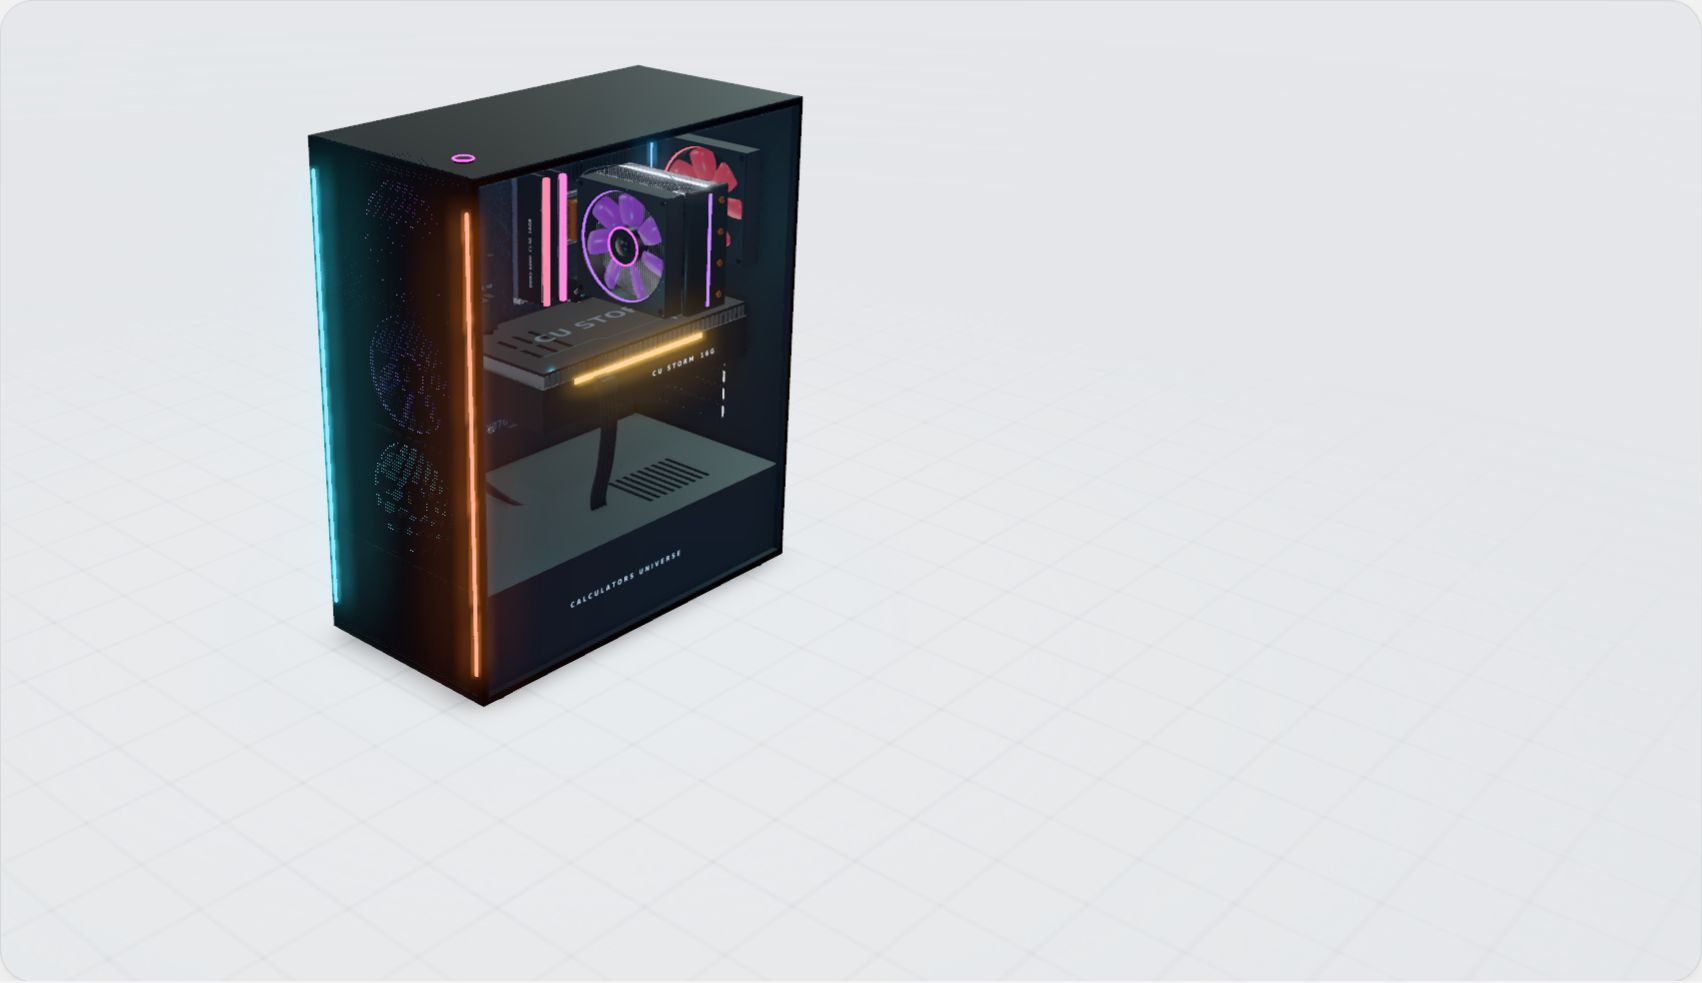
Interactive 3D

PC Anatomy Explorer

Every part of a gaming PC in interactive 3D. Rotate it, take it apart, and click any part to see what it does, what to check before buying it and where it plugs in.

  • 12 parts
  • 32 labelled key areas
  • 12-step build guide
Share this tool
A gaming PC in 3D with a glass side panel, showing the motherboard, graphics card, RAM, CPU cooler and power supply

Drag rotate · Click a part · Double-click reset

0%
RGB
Loading 3D model

Every part of a gaming PC, explained

What each component does, what to check before you buy it, where it connects and how to install it. Click a part in the 3D view to bring its card up beside the model.

Build step 1 of 12

Motherboard

Connects every part together

The main circuit board. Its socket and chipset decide which CPUs work, its slots set how much memory and storage you can add, and its VRM feeds the CPU clean power.

Key areas

  1. 1
    CPU socketHolds the processor. AM5 and Intel LGA sockets put the pins in the socket and flat contact pads on the CPU.
  2. 2
    VRM and heatsinksVoltage regulators turn the 12 V from the EPS cable into the roughly 1.1 to 1.4 V the CPU runs on. The finned heatsinks keep them cool under load.
  3. 3
    DIMM slotsFour memory slots. With two sticks, fill A2 and B2 first for dual channel.
  4. 4
    PCIe x16 slotThe steel-reinforced slot wired straight to the CPU, used for the graphics card.
  5. 5
    M.2 slot and heatsinkWhere the NVMe SSD sits. The first M.2 slot is usually connected directly to the CPU.
  6. 6
    ChipsetRuns the extra USB ports, SATA ports and lower PCIe and M.2 slots, and links them to the CPU.
  7. 7
    24-pin ATX powerMain power input for the board, from the PSU.
  8. 8
    8-pin EPS powerDedicated CPU power at the top-left corner of the board.
  9. 9
    SATA portsData connections for 2.5-inch SSDs and 3.5-inch hard drives.
  10. 10
    Rear I/OUSB, network, audio and video ports on the back of the PC. Video here only works with a CPU that has integrated graphics.
  11. 11
    Front-panel headerSmall pins for the case power button, reset button and LEDs.
  12. 12
    CMOS batteryA coin cell that keeps the BIOS settings and clock when the PC is unplugged.

What to check

Socket
AM5, LGA1700 or LGA1851, must match the CPU
Chipset
B650, X870, B760, Z890 and so on
Memory type
DDR4 or DDR5, a board supports only one
M.2 slots
How many, and which PCIe generation

Where it connects

Everything plugs into it: CPU in the socket, RAM in the DIMM slots, GPU in the top PCIe x16 slot, SSDs in the M.2 slots, and power through the 24-pin and 8-pin EPS headers.

How to install it

Build on top of the motherboard box, not on carpet. Confirm the BIOS version supports your CPU before you start.

Common mistake

Assuming a new CPU works with an older BIOS. Check the CPU support list, or pick a board with USB BIOS Flashback.

Related calculators

Build step 2 of 12

Processor (CPU)

Runs game logic and every program

Executes the instructions for every program. Games lean on fast single-core speed and large cache; video editing, rendering and compiling scale with core count.

What to check

Cores / threads
More helps multitasking and creative work
Boost clock
GHz, a rough guide to single-core speed
L3 cache
Large cache gives big gains in many games
Power
TDP or PPT in watts, sizes the cooler and PSU

Where it connects

Sits in the motherboard socket and talks directly to the RAM, the graphics card's x16 slot and usually the first M.2 SSD. Turn on Connections in the 3D view to see those lanes.

How to install it

Lift the retention arm, match the small triangle on the CPU corner to the mark on the socket, and lower it straight down. It drops in with zero force. Then close the arm.

Common mistake

Pressing the CPU into the socket. Bent socket pins are the most expensive beginner mistake.

Related calculators

Build step 3 of 12

Memory (RAM)

Fast short-term workspace for the CPU

Holds the data the CPU is working on right now. With too little, the system falls back to the much slower SSD. For gaming, 32 GB of DDR5 is the current sweet spot.

What to check

Capacity
GB, 32 GB for gaming, more for editing
Type
DDR4 or DDR5, must match the board
Speed
MT/s, such as 6000
Latency
CAS latency (CL), lower is better

Where it connects

DIMM slots beside the CPU socket. With two sticks, use A2 and B2, usually the second and fourth slots from the CPU, exactly as shown in the model.

How to install it

Open the slot latches, line up the notch on the stick with the key in the slot, and press both ends down firmly until the latches click.

Common mistake

Using two slots side by side. That often runs single channel and costs frame rate in CPU-heavy games.

Related calculators

Build step 4 of 12

NVMe SSD

Stores your OS and games

An M.2 NVMe drive plugs straight into the motherboard under a heatsink and moves data over PCIe. Having an SSD at all matters far more for load times than PCIe 4.0 versus 5.0.

What to check

Capacity
1 TB minimum, 2 TB for a big game library
Interface
PCIe 4.0 or 5.0 NVMe
Speed
Sequential read and write in MB/s
Endurance
TBW, terabytes it is rated to write

Where it connects

An M.2 slot on the motherboard, held by a small screw or a tool-less latch. No cables needed.

How to install it

Remove the slot heatsink, slide the drive in at about 30 degrees, press it flat and secure it. Peel the film off the heatsink's thermal pad before refitting it.

Common mistake

Leaving the film on the heatsink's thermal pad, so the drive runs hot and throttles.

Related calculators

Build step 5 of 12

Thermal paste

Fills the gap between the CPU and its cooler

A thin layer of heat-conducting compound that fills the microscopic gaps between the CPU's heat spreader and the cooler base. Without it, trapped air insulates the CPU and it overheats.

What to check

Type
Non-conductive ceramic or carbon paste is safest; liquid metal conducts electricity
Amount
A pea-sized dot, about 4 mm, for most desktop CPUs
Pre-applied
Many coolers ship with paste already on the base
Replacement
Every few years, or whenever the cooler comes off

Where it connects

Sits between the CPU heat spreader and the base of the CPU cooler.

How to install it

Clean the CPU with isopropyl alcohol, put a pea-sized dot in the middle, and let the cooler's mounting pressure spread it. There is no need to spread it by hand.

Common mistake

Using too much. Excess paste squeezes out over the socket, and a thick layer insulates instead of conducting.

Related calculators

Build step 6 of 12

CPU cooler

Pulls heat away from the CPU

Copper heat pipes carry heat from the base up into an aluminium fin stack, and the fan pushes it toward the rear exhaust. A high-end CPU can put out 150 to 250 W of heat under load.

Key areas

  1. 1
    Copper baseThe flat contact plate that sits on the CPU. Heat moves from here into the heat pipes.
  2. 2
    Heat pipesSealed copper tubes with a little liquid inside that evaporates at the hot end and condenses in the fins, moving heat far faster than solid copper.
  3. 3
    Fin stackThin aluminium plates that give the heat a large surface area to escape into the air.
  4. 4
    Fan and clipsPushes air through the fins toward the rear exhaust. Wire clips let you add a second fan.

What to check

Socket support
The box must include a kit for your socket
Height
mm, must be below the case limit
RAM clearance
Tall RAM can hit the fin stack or fan
Rated heat load
Watts it can handle, compare with CPU power

Where it connects

Mounts over the CPU with thermal paste between the base and the heat spreader. Its fan plugs into the CPU_FAN header.

How to install it

Fit the bracket for your socket, put a pea-sized dot of thermal paste on the CPU, then tighten the cooler screws a little at a time in a diagonal pattern.

Common mistake

Leaving the plastic film on the cooler base. The CPU overheats within minutes.

Related calculators

Build step 7 of 12

Case

Holds everything and steers the airflow

The chassis decides which parts physically fit and how air moves through the build. Its size class (ATX mid-tower, micro-ATX or mini-ITX) sets the largest motherboard it accepts. The shroud along the bottom hides the PSU and drive cage.

Key areas

  1. 1
    Front I/OPower button, USB-C, USB-A and audio jacks, wired to headers along the bottom of the motherboard.
  2. 2
    Tempered-glass side panelShows off the build. Glass panels restrict airflow less than you might think because air enters through the front mesh.
  3. 3
    Mesh front panelPerforated steel that lets the intake fans breathe while catching some dust.
  4. 4
    PSU shroudCovers the power supply and drive cage to hide cables and keep airflow tidy.
  5. 5
    Cable grommetsRubber-lined holes that route cables behind the motherboard tray.
  6. 6
    Expansion slotsRear openings that line up with the graphics card's bracket and other add-in cards.

What to check

Board support
ATX, micro-ATX or mini-ITX
GPU clearance
Maximum card length in mm
Cooler height
Tallest tower cooler that fits the side panel
Radiator mounts
240, 280 or 360 mm at front or top

Where it connects

Front-panel USB, audio, power and reset cables run to headers along the bottom edge of the motherboard.

How to install it

Remove the glass and rear panels and check the standoffs line up with your motherboard's screw holes. Lower the board in at an angle so the rear I/O lines up, then screw it down.

Common mistake

A standoff with no matching hole touches the back of the board and can short it.

Related calculators

Build step 8 of 12

Case fans

Pull cool air in, push hot air out

The three front fans pull cool air in and the rear fan pushes warm air out. Slightly more intake than exhaust (positive pressure) stops dust being sucked in through every gap.

What to check

Size
120 mm or 140 mm, matched to the mounts
Airflow
CFM, higher moves more air
Static pressure
mmH₂O, matters behind meshes and radiators
Connector
4-pin PWM for speed, 3-pin 5 V ARGB for lighting

Where it connects

4-pin PWM headers on the motherboard (CHA_FAN or SYS_FAN) or a fan hub. Lighting runs to a separate 3-pin ARGB header.

How to install it

The open side of the frame faces the incoming air. Arrows moulded into the frame show the airflow and blade direction.

Common mistake

Setting every fan to exhaust. Negative pressure pulls dust in through every unfiltered gap.

Related calculators

Build step 9 of 12

Power supply (PSU)

Turns wall power into power for every part

Converts AC from the wall into the 12 V, 5 V and 3.3 V rails the parts use. It runs coolest and quietest at roughly 50 to 70 percent of its rated load, so leave headroom.

Key areas

  1. 1
    Cooling fanPulls air through the PSU. Many quality units stop the fan entirely at low load.
  2. 2
    Modular panelSockets for the detachable cables, so you only fit the ones you need.
  3. 3
    Rating labelShows the wattage, efficiency rating and how much power each rail can deliver.
  4. 4
    Power inlet and switchThe mains cable plugs in at the back; the switch cuts power completely.

What to check

Wattage
Total system draw plus headroom
Efficiency
80 Plus Bronze, Gold or Platinum
Standard
ATX 3.x with native 12V-2x6 for modern GPUs
Cables
Fully modular makes routing easier

Where it connects

24-pin to the motherboard, 8-pin EPS to the CPU power header, PCIe or 12V-2x6 to the graphics card, and SATA for drives.

How to install it

Mount it fan-down if the case has a filtered vent underneath, otherwise fan-up. Attach the modular cables you need before sliding it under the shroud.

Common mistake

Reusing modular cables from a different PSU. Pinouts are not standard between brands and can destroy parts.

Related calculators

Build step 10 of 12

SATA hard drive

Cheap bulk storage

A 3.5-inch hard drive stores a lot of data for little money but is many times slower than NVMe. Use it for media, backups and older games; keep Windows and current games on the NVMe drive.

What to check

Capacity
TB, the main reason to buy one
Speed
About 200 to 280 MB/s for a 7200 RPM drive
Noise
Spinning drives click and hum, so mount them on rubber
Alternative
A 2.5-inch SATA SSD reaches about 550 MB/s

Where it connects

A SATA data cable to a SATA port on the motherboard and a SATA power cable from the PSU.

How to install it

Slide the drive into the cage sled under the shroud, connect SATA data and power, then initialise it in Disk Management so Windows can see it.

Common mistake

Filling an M.2 slot that shares lanes with SATA ports, which can switch some SATA ports off. Check the lane-sharing table in the manual.

Related calculators

Build step 11 of 12

Graphics card (GPU)

Draws every frame you see

Renders the 3D scene, so it sets your frame rate at a given resolution more than any other part. VRAM holds textures, and running out of it causes stutter.

Key areas

  1. 1
    Cooling fansThree axial fans blow through the heatsink. Many cards stop them at idle for silent desktop use.
  2. 2
    Heatsink finsA large fin stack on a vapour chamber or heat pipes spreads the GPU's heat.
  3. 3
    12V-2x6 power connectorSingle 16-pin power input on modern cards, rated up to 600 W.
  4. 4
    PCIe x16 connectorGold edge contacts that plug into the motherboard's top slot.
  5. 5
    BackplateMetal plate that stiffens the card against sag and helps cool the memory.
  6. 6
    Display outputsDisplayPort and HDMI ports on the bracket. Plug your monitor in here.

What to check

VRAM
GB, 12 GB or more for 1440p
Power
Watts and connector (8-pin or 12V-2x6)
Length
mm, compare with case clearance
Thickness
Slots it covers, 2 to 3.5 is common

Where it connects

The top PCIe x16 slot nearest the CPU, plus 8-pin or 12V-2x6 power from the PSU. Plug your monitor into the graphics card, not the motherboard.

How to install it

Remove the slot covers that line up with the top x16 slot. Push the card in until the slot latch clicks, screw the bracket to the case, then connect its power cable.

Common mistake

Plugging the monitor into the motherboard, so games run on integrated graphics or not at all.

Related calculators

Build step 12 of 12

Power cables

Carry power from the PSU to each part

A modular PSU has a separate cable for each connector. This build uses a 24-pin for the motherboard, an 8-pin EPS for the CPU and a 12V-2x6 for the graphics card, routed behind the motherboard tray.

What to check

24-pin ATX
Main motherboard power
8-pin EPS
CPU power, top-left of the board
12V-2x6
Up to 600 W for modern graphics cards
SATA power
Drives, fan hubs and RGB controllers

Where it connects

From the modular panel on the PSU, through the rubber grommets beside the board, to each connector.

How to install it

Run the 24-pin to the edge of the board, the EPS across the top to the CPU header, and the 12V-2x6 to the graphics card. Then add front-panel, USB and fan cables, power on and check the BIOS sees the CPU, RAM and drives.

Common mistake

A 12V-2x6 connector that isn't fully seated. Push until it clicks and no gap shows.

Related calculators

How to build a PC: the order parts go in

This is the order the Build mode above follows. Fitting the CPU, RAM, SSD and cooler before the board goes in the case gives you far more room to work.

  1. 01 Prepare the motherboard Build on top of the motherboard box, not on carpet. Confirm the BIOS version supports your CPU before you start.
  2. 02 Seat the CPU Lift the retention arm, match the small triangle on the CPU corner to the mark on the socket, and lower it straight down. It drops in with zero force. Then close the arm.
  3. 03 Install the RAM Open the slot latches, line up the notch on the stick with the key in the slot, and press both ends down firmly until the latches click.
  4. 04 Fit the NVMe SSD Remove the slot heatsink, slide the drive in at about 30 degrees, press it flat and secure it. Peel the film off the heatsink's thermal pad before refitting it.
  5. 05 Apply thermal paste Clean the CPU with isopropyl alcohol, put a pea-sized dot in the middle, and let the cooler's mounting pressure spread it. There is no need to spread it by hand.
  6. 06 Mount the CPU cooler Fit the bracket for your socket, put a pea-sized dot of thermal paste on the CPU, then tighten the cooler screws a little at a time in a diagonal pattern.
  7. 07 Mount the board in the case Remove the glass and rear panels and check the standoffs line up with your motherboard's screw holes. Lower the board in at an angle so the rear I/O lines up, then screw it down.
  8. 08 Fit the case fans The open side of the frame faces the incoming air. Arrows moulded into the frame show the airflow and blade direction.
  9. 09 Install the power supply Mount it fan-down if the case has a filtered vent underneath, otherwise fan-up. Attach the modular cables you need before sliding it under the shroud.
  10. 10 Add the storage drive Slide the drive into the cage sled under the shroud, connect SATA data and power, then initialise it in Disk Management so Windows can see it.
  11. 11 Install the graphics card Remove the slot covers that line up with the top x16 slot. Push the card in until the slot latch clicks, screw the bracket to the case, then connect its power cable.
  12. 12 Connect the cables Run the 24-pin to the edge of the board, the EPS across the top to the CPU header, and the 12V-2x6 to the graphics card. Then add front-panel, USB and fan cables, power on and check the BIOS sees the CPU, RAM and drives.

Frequently asked questions

What are the main parts of a gaming PC?

A gaming PC is built from a case, motherboard, processor (CPU), thermal paste, CPU cooler, memory (RAM), an NVMe SSD, a graphics card (GPU), a power supply (PSU), case fans and power cables. A SATA hard drive is optional extra storage.

What order do you build a PC in?

Most builders fit the CPU, RAM, NVMe SSD, thermal paste and CPU cooler to the motherboard while it sits on its box, then mount the board in the case, fit the fans and power supply, add any SATA drives, install the graphics card last and finish by connecting the cables.

Which RAM slots should I use with two sticks?

Use slots A2 and B2, usually the second and fourth slots counting from the CPU. That runs the memory in dual channel. Two sticks side by side in A1 and A2 often run single channel, which costs performance in CPU-heavy games.

Which PCIe slot does the graphics card go in?

The top PCIe x16 slot, the one closest to the CPU. It is wired directly to the CPU with all 16 lanes; lower full-length slots are often only x4 electrically.

Do I need a separate CPU cooler?

Usually yes. Many processors, including Intel's K-series and AMD's X3D chips, ship without a cooler. A tower air cooler or an AIO liquid cooler sized for the CPU's power is needed, along with thermal paste if the cooler doesn't come with it pre-applied.

What is the difference between an NVMe SSD and a SATA hard drive?

An NVMe SSD plugs into an M.2 slot and reads at 3,500 to 14,000 MB/s, so Windows and games load quickly. A 7200 RPM SATA hard drive reads at about 200 to 280 MB/s but costs far less per terabyte, which makes it good for media and backups.

How big a power supply do I need?

Add up the CPU and GPU power plus about 100 W for the rest, then leave 30 to 50 percent headroom. A mid-range gaming PC typically needs 650 to 750 W, while the most power-hungry cards need 1000 W or more. The PSU wattage calculator works it out for your exact parts.

Do all the case fans need to be intakes?

No. The usual setup is front fans as intakes and the rear (and top) fans as exhausts, with slightly more intake than exhaust so the case stays at positive pressure and gathers less dust.